

Installing a flood light case might seem like a daunting task, especially if you're not well - versed in electrical work. However, with the right guidance and a bit of patience, you can accomplish this project successfully. As a trusted supplier of high - quality flood light cases, we're here to walk you through the entire installation process.
1. Preparation
Before you start the installation, it's crucial to gather all the necessary tools and materials. You'll need a screwdriver (both flat - head and Phillips - head), a drill with appropriate drill bits, a wire stripper, electrical tape, a voltage tester, and of course, the flood light case. At our store, we offer a wide range of flood light cases to suit different needs. For instance, the New Design LED Flood Light Lamp Shell 50W Die Cast Light Housing without Driver and LED Chips is a great option for those looking for a durable and stylish solution.
Additionally, you should check the location where you plan to install the flood light. Make sure it's a suitable spot, away from any obstructions and close to a power source. Also, ensure that the area is clean and free from debris.
2. Safety First
Safety is of utmost importance when working with electricity. Always turn off the power supply to the area where you'll be installing the flood light. Use a voltage tester to double - check that there's no electrical current flowing through the wires. Wear appropriate safety gear, such as gloves and safety glasses, to protect yourself from any potential hazards.
3. Mounting the Flood Light Case
The first step in the installation process is to mount the flood light case. Start by marking the location on the wall or surface where you want to install the light. Use a drill to make holes at the marked spots. The size of the drill bit will depend on the type of screws you'll be using to attach the flood light case.
Once the holes are drilled, align the flood light case with the holes and insert the screws. Tighten the screws using a screwdriver until the case is firmly attached to the surface. For a more stable installation, you may want to use wall anchors, especially if you're mounting the light on a drywall.
4. Wiring the Flood Light
After mounting the flood light case, it's time to wire it. Open the flood light case to access the wiring compartment. You'll typically find three wires: a black (hot) wire, a white (neutral) wire, and a green or bare copper (ground) wire.
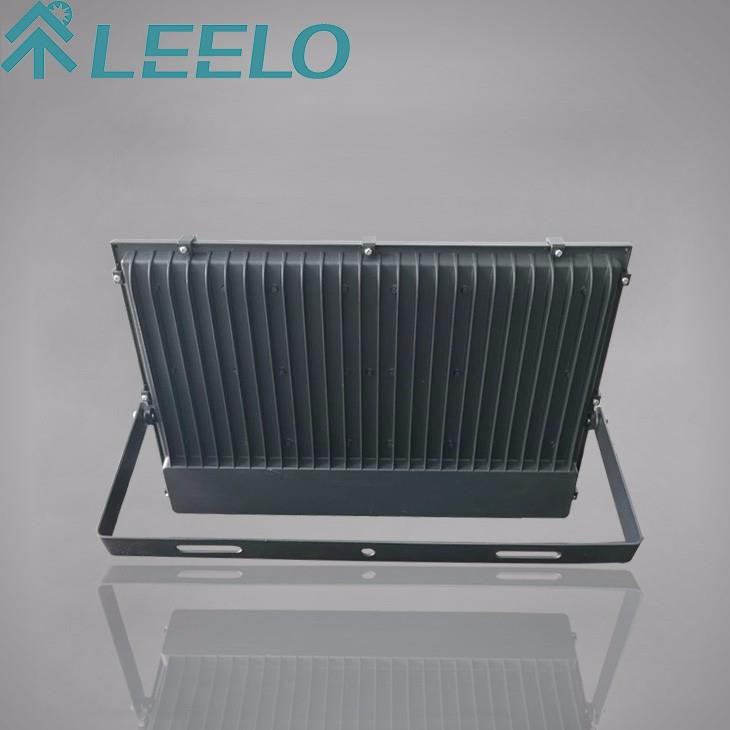

Using a wire stripper, remove about half an inch of insulation from the ends of the wires. Connect the black wire from the flood light to the black (hot) wire from the power source. Twist the ends of the wires together and secure them with a wire nut. Repeat the same process for the white (neutral) wires.
The green or bare copper ground wire should be connected to the grounding screw in the flood light case and to the grounding wire from the power source. This step is essential for ensuring the safety of the installation.
Once all the wires are connected, wrap the connections with electrical tape to prevent any exposed wires.
5. Installing the LED Chips and Driver (if applicable)
Some of our flood light cases, like the High Efficient Aluminum Ultra Slim 30W Outdoor Nano LED Flood Light Housing, come without LED chips and drivers. If your case is one of them, you'll need to install these components.
Follow the manufacturer's instructions for installing the LED chips and driver. Typically, the LED chips are attached to a heat sink and then inserted into the flood light case. The driver is connected to the LED chips and the power supply wires.
6. Testing the Flood Light
Before closing the flood light case, it's a good idea to test the light. Turn on the power supply and use a voltage tester to check if there's power reaching the flood light. If the light doesn't turn on, double - check the wiring connections to ensure they're secure.
If everything is working correctly, carefully close the flood light case and secure it with the screws.
7. Adjusting the Angle
Once the flood light is installed and working, you can adjust the angle of the light to suit your needs. Most flood light cases have a swivel or adjustable mounting bracket that allows you to direct the light in the desired direction.
Different Types of Flood Light Cases and Their Installation Considerations
We offer a diverse range of flood light cases, each with its own unique features and installation requirements. For example, the 200W Nano Aurora COB Flood Light Housing Leelo Lighting is a high - power option that may require additional cooling and a more robust mounting system.
When installing a high - power flood light case, make sure the mounting surface can support the weight of the light. Also, ensure that there's adequate ventilation to prevent the light from overheating.
Troubleshooting Tips
If you encounter any issues during the installation process, here are some troubleshooting tips:
- Light doesn't turn on: Check the wiring connections to ensure they're secure. Also, make sure the power supply is turned on and that there's power reaching the light.
- Flickering light: This could be due to a loose connection or a problem with the driver. Check the wiring and replace the driver if necessary.
- Overheating: Ensure that the flood light case has proper ventilation. If the light is still overheating, it may be a sign of a faulty component.
Conclusion
Installing a flood light case is a manageable project that can enhance the security and aesthetics of your property. By following the steps outlined in this guide and choosing the right flood light case from our selection, you can achieve a professional - looking installation.
If you're interested in purchasing a flood light case or have any questions about the installation process, we're here to help. Contact us for more information and to start a procurement negotiation. We're committed to providing you with the best products and services to meet your lighting needs.
References
- General electrical safety guidelines from the National Electrical Code.
- Manufacturer's instructions for the flood light cases.