

As a seasoned supplier of flood light fixtures, I understand the importance of ensuring that these lighting solutions are properly adjusted to meet the specific needs of various applications. Whether it's illuminating a large outdoor area, highlighting architectural features, or providing security lighting, the correct direction of flood light fixtures can significantly enhance their effectiveness. In this blog post, I will share some practical tips on how to adjust the direction of flood light fixtures to achieve the best lighting results.
Understanding the Basics of Flood Light Direction
Before diving into the adjustment process, it's crucial to have a basic understanding of how flood light fixtures work and what factors can affect their direction. Flood lights are designed to emit a wide, even beam of light over a large area. The direction of the light beam is determined by the angle at which the fixture is installed and the orientation of the reflector or lens inside the fixture.
The angle of the fixture installation is typically measured in degrees from the vertical or horizontal plane. A fixture installed at a 0-degree angle is pointing straight down or up, while a 90-degree angle means it's pointing horizontally. The orientation of the reflector or lens can also be adjusted to control the spread and direction of the light beam.
Tools You'll Need
To adjust the direction of flood light fixtures, you'll need a few basic tools:
- Ladder or scaffolding: Depending on the height of the fixture, you may need a ladder or scaffolding to reach it safely.
- Screwdriver or Allen wrench: Some flood light fixtures are secured with screws or Allen bolts, so you'll need the appropriate tool to loosen and tighten them.
- Level: A level will help you ensure that the fixture is installed at the correct angle.
- Flashlight: A flashlight can be useful for illuminating the area around the fixture, especially if you're working in low-light conditions.
Step-by-Step Guide to Adjusting Flood Light Direction
- Turn off the power: Before you start working on the flood light fixture, make sure to turn off the power at the circuit breaker to avoid the risk of electric shock.
- Inspect the fixture: Carefully examine the fixture to determine how it is mounted and if there are any adjustable components. Some fixtures may have brackets or joints that allow you to change the angle, while others may require you to loosen and reposition the entire fixture.
- Loosen the mounting hardware: If the fixture is secured with screws or bolts, use a screwdriver or Allen wrench to loosen them. Be careful not to remove them completely, as you'll need to tighten them again later.
- Adjust the angle: Use a level to ensure that the fixture is installed at the correct angle. You can adjust the angle by tilting the fixture up or down, or by rotating it left or right. Make small adjustments and check the level frequently to ensure accuracy.
- Check the light beam: Once you've adjusted the angle, turn on the power and check the light beam to see if it's hitting the desired area. If necessary, make further adjustments until you're satisfied with the results.
- Tighten the mounting hardware: Once you're happy with the direction of the light beam, use a screwdriver or Allen wrench to tighten the mounting hardware. Make sure the fixture is securely fastened to prevent it from moving or vibrating.
- Test the fixture: After tightening the mounting hardware, turn off the power again and test the fixture to make sure it's working properly. Check the light beam to ensure that it's still hitting the desired area.
Tips for Optimal Flood Light Direction
- Consider the purpose of the lighting: The direction of the flood light fixture should be determined by the purpose of the lighting. For example, if you're using the fixture to illuminate a large outdoor area, you may want to aim it at a wide angle to cover as much ground as possible. If you're highlighting a specific object or feature, you may want to aim the light directly at it.
- Avoid glare: Glare can be a problem when using flood light fixtures, especially if they're installed in areas where people will be looking directly at the light. To avoid glare, try to aim the light away from areas where people will be sitting or standing, and use shields or diffusers to soften the light.
- Use multiple fixtures: In some cases, using multiple flood light fixtures can provide better lighting coverage and reduce shadows. When using multiple fixtures, make sure to space them evenly and aim them in different directions to create a balanced lighting effect.
- Regularly check and adjust the fixtures: Over time, the direction of flood light fixtures may change due to weather conditions, vibrations, or other factors. To ensure optimal lighting performance, it's a good idea to regularly check and adjust the fixtures as needed.
Our Flood Light Fixture Products
At our company, we offer a wide range of high-quality flood light fixtures to meet the needs of various applications. Our products include:
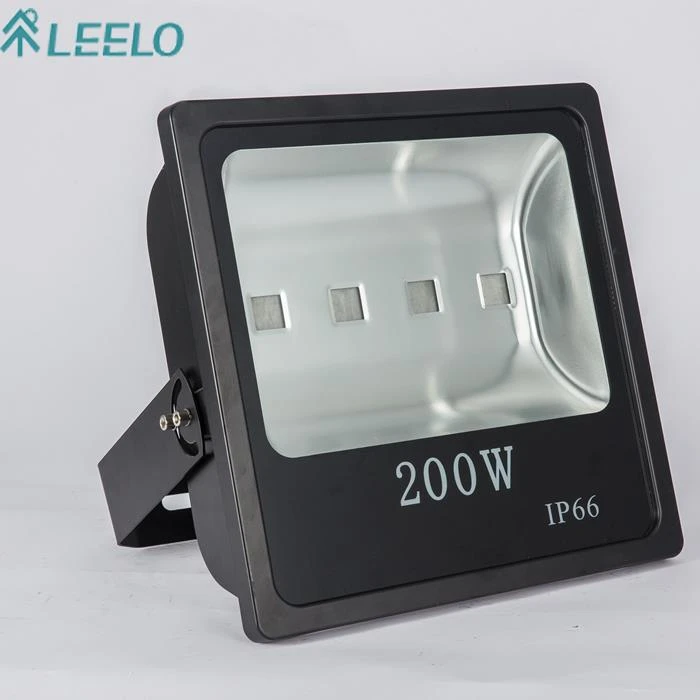

- LEELO Die-casting Round Square 50W LED Flood Light Housing: This die-cast aluminum housing is designed for 50W LED flood lights, providing excellent heat dissipation and durability.
- Competitive Price 50W Aluminum Housing Of LED Flood Light: Our 50W aluminum housing offers a cost-effective solution for LED flood lights, with a sleek design and high-quality construction.
- New Style LED Flood Light Housing Made in China: This new-style LED flood light housing is made in China, featuring a modern design and advanced technology.
If you're interested in learning more about our flood light fixture products or have any questions about adjusting their direction, please don't hesitate to contact us. We're here to help you find the best lighting solutions for your needs.
Conclusion
Adjusting the direction of flood light fixtures is a relatively simple process that can have a significant impact on the effectiveness of your lighting system. By following the steps outlined in this blog post and using the tips and tricks provided, you can ensure that your flood light fixtures are properly adjusted to meet the specific needs of your application. If you have any further questions or need assistance with your flood light fixtures, please don't hesitate to contact us. We're here to help you achieve the best lighting results possible.
References
- Lighting Research Center. (n.d.). Lighting Basics: Floodlights. Retrieved from https://www.lrc.rpi.edu/programs/nlpip/lightingAnswers/whatis/floodlights.asp
- Energy Star. (n.d.). Lighting for the Outdoors. Retrieved from https://www.energystar.gov/products/lighting_fans/lighting/outdoor_lighting
- Home Depot. (n.d.). How to Install Outdoor Flood Lights. Retrieved from https://www.homedepot.com/c/ah/how-to-install-outdoor-flood-lights/9ba683603be9fa5395fab90178a72d4